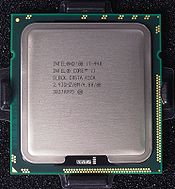
Intel i7

Core i7
Intel core i7 940 top R7309478 wp.jpg
ProducedFrom 2008
Common manufacturer(s)
  • Intel
Max. CPU clock rate1.6 GHz to 4.2 GHz
QPI speeds4.8 GT/s to 8 GT/s
Min. feature size45 nm, 32 nm, or 22 nm
Instruction setx86x86-64MMXSSESSE2SSE3SSSE3SSE4.1SSE4.2
MicroarchitectureNehalem
Sandy Bridge
Sandy Bridge-E
Ivy Bridge
Ivy Bridge-E
Haswell
Haswell-E
Broadwell
Skylake
Number of cores2, 4, 6, 8 or 10
Socket(s)
Core name(s)
Intel Core i7 is a name that the company Intel uses for the computer processors it makes for high-end desktop and laptop computers and tablets. Intel uses this name for the fastest processors that they think will be used to build the most powerful consumer devices. The 'Core' part of the name, which refers to the processor's core, has been used by Intel since 2006, but the first Core i7 processor was released 3 years later in 2009.
There are different types of Core i7 processor. The name does not name a type. Instead, it is the name for all of the fast processors that Intel thinks should be sold to consumers. Intel uses two other "Core i-" names for its processors for consumers: "Core i5" and "Core i3." The "Core i5" processors are mostly as fast as i7 processors, but lack the Hyper Threading technology which allows each core to be used twice simultaneously giving the impression of doubling the cores.
Intel uses a different name, Xeon, for processors that Intel makes for "server" computers for businesses (and some rare laptops). Some of the "Core i7" processors are almost the same as some of the "Xeon" processors, but each of the Xeon processors is a little bit different than the "Core i7" processor, because a "server" computer is not the same as a consumer computer. Intel also makes other "Xeon" processors that are not the same as any "Core i7" processor. Unlike the Core i7, Xeon processors support ECC (error corrected) memory, and multiple CPUs on the same motherboard.

Comments

Popular posts from this blog

Cara Membuat Tespen Sederhana

Membuat Testpen Sederhana السَّلاَمُ عَلَيْكُمْ وَرَحْمَةُ اللهِ وَبَرَكَاتُهُ Skema Tespen Apabila anda ingin mengetahui adanya aliran listrik dalam instalasi listrik rumah anda, maka anda membutuhkan alat yang bernama Tespen. Sekarang kita akan membuat tespen dengan harga yang sangat murah dengan memanfaatkan bekas pulpen.  Sedangkan cara merangkainya adalah sebagai berikut : Salah satu ujung dari kaki lampu neon dihubungkan dengan penutup pulpen dan satunya lagi dihubungkan dengan resistor, setelah resistor dihubungkan lagi ke ujung pulpen. Jika kita menggunakan pulpen yang masih baru, maka kita akan mendapatkan pulpen dwifungsi yakni menulis dan juga untuk mengetahui adanya tegangan listrik(AC). Alat & Bahan ; ~ Bulpoint. ~ Transistor. ~ Solder. ~ Tutup Bulpoint Fungsi ; Ialah Alat Yang Digunakan untuk mengecek atau mengetahui ada tidaknya suatu tegangan listrik , Fungsi tespen yaitu untuk mengetahui ada tidaknya tegangan listrik pada suatu benda

Teknologi Layanan Jaringan

Pengertian Dari: 1.       Komunikasi Serial Antar Komputer Menggunakan Putty/Hyperterminal. 2.      Progtam Remote Control Winamp Menggunakan Winlire. 3.      Menyalakan Lampu Rumah Dengan Hp Android Bluetoth. 4.     Mengontrol Peralatan Listrik Melalui Wifi. 5.      Mengontrol Robot Menggunakan Remote Control 6.     Mengontrol Mobil Remote Control. Tautan: 1.      http://www.elektro.undip.ac.id/kenung/?p=296 2.     https://www.tianrosandhy.com/blog/remote+control+collection+:+software+presentasi+profesional+modal+android 3.     https://tutorkeren.com/artikel/tutorial-smartphone-android-dapat-dijadikan-saklar-untuk-kontrol-lampu-rumah.htm 4.    https://telinks.wordpress.com/2013/01/20/mengendalikan-peralatan-listrik-via-internetweb-dengan-starduino-board/ 5.     http://www.jogjarobotika.com/blog/membuat-mobil-remote-control-dengan-arduino-dan-bluetooth-hc-05-b106.html 6.    http://www.mobilremot.com/blog/memahami-istilah-remote-control/ --------------------

Membuat 000Webhost

Cara Daftar / Masuk 000Webhost. Assalamuallaikum Wr.Wb. Dibawah Ini Adalah Cara Daftar 000Webhost Dengan Gratis Selama 1Bulan 1. Pertama Kalian Buka Di Google Chrome / Mozila Firefox. 2. Kemudian Buka  https://www.000webhost.com/  Atau 000Webhost. 2. Setalah Itu Pilih $0 / Tanpa Bayar , Atau Gratis Selama Satu Bulan Kemudian Klik Selamanya Gratis Setelah Itu Ada Perintah Untuk Daftar / Login . Setelah Itu Pilih Masuk Untuk Daftar Atau Bisa Menggunakan Gmail. 3. Setelah Berhasil Masuk Atau Bisa Pilih Get Started. 4. Kemudian Bisa Pilih NEXT/SKIP 2x ,  Kemudian Setelah Itu Perintah Untuk Mengisi Nama Dan Password . 5. Kemudian Selesai Tinggal Pilih (+) Create New Site , Kemudian Ketika Ada Masalah Cukup Tenang Saja Dikarenakan Penggunan Mendaftar Banyak . 6. Itu Tadilah Penjelasan Saya Mengenai Mendaftar 000Webhost . Assalamuallaikum Wr.Wb